Skyline Trail to Panorama Point in Mount Rainier National Park
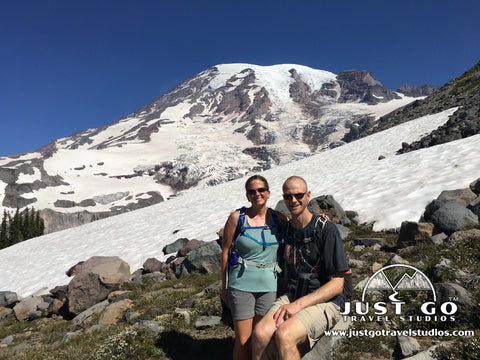
Peter BrahanOf all the great hikes in Mount Rainier National Park, the Skyline Trail to Panorama Point is, in our opinion, one of the best hikes in Mount Rainier. Starting near the Henry M. Jackson Visitor Center in the Paradise Area, the trail traverses through lush fields of wildflowers, near several running rivers (and waterfalls) and has amazing views of both Mount Rainier and the surrounding peaks.
While the distance, elevation gain and the high altitude make this hike a bit challenging, for those who are up to the task, you’ll be amazed at what this adventure has to offer.
If you only have one day in Mount Rainier, can only do one hike and are up for a heading up in elevation, this hike is definitely for you!
SKYLINE TRAIL TO PANORAMA POINT DETAILS
- Difficulty: Difficult
- Distance: 5.5 miles (round-trip)
- Trail: Loop
- Elevation gain: 1,758 feet
- Peak elevation reached: 7,039 feet
- Best time of year to hike: Early summer to late fall
- To beat the crowds: Arrive before 8:00 am or after 3:00 pm
- Footwear: Hiking boots
- Watch out for: Mosquitoes, sun exposure
- Restrooms: Located at the trailhead and on the trail
- Pets: Not allowed
- Time needed: 4 to 5 hours

The Skyline Trail and Panorama Point Hike is one of many hikes covered in our detailed itinerary for Mount Rainier National Park. Our guide ranks the best hikes and covers the best scenic drives and places to visit during your time in the park. We help take the guesswork out of planning by highlighting key items to bring on your trip as well as discuss other places to visit in the area.
PARKING AND TRAILHEAD FOR THE SKYLINE TRAIL
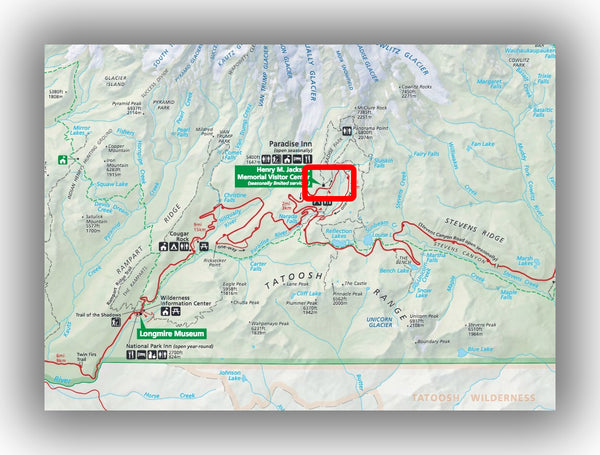
Mount Rainier Paradise Area Location, courtesy of the National Park Service
The Skyline Trail hike is located in the Paradise area, which is in the southwestern quadrant of the park. From outside the park, the easiest way of entering is by taking the Nisqually entrance (located near Ashford, WA). Another option is to take the Stevens Canyon Entrance. In either case, you can plan on it taking quite some time to get to the parking area, as the drive along Paradise Valley and Stevens Canyon Roads are windy and scenic, and traffic can be slow. This means that if you want to get an early start on the trail (which we recommend) that you are going to have to enter the park especially early.
- Directions from Ashford to the Paradise Area (this will take about 40 minutes without traffic)
- Directions from the Stevens Canyon Entrance to the Paradise Area (this will take about one hour without traffic)
The Paradise Area parking lot is large and contains approximately 200 parking spots (not including the parking spots reserved for those staying at the Paradise Inn). That may seem like a lot, but since there is a ton to do here, this is the most popular gathering area in the park and the lot fills up quickly. If you don’t want to waste time waiting, we recommend getting to the lot before 8:00 in the morning. If you arrive later in the day during peak times of the year, access to the lot may be closed.
The good news is that there are always cars coming and going, so if you are patient enough (when the lot is open), you should be able to find a spot.
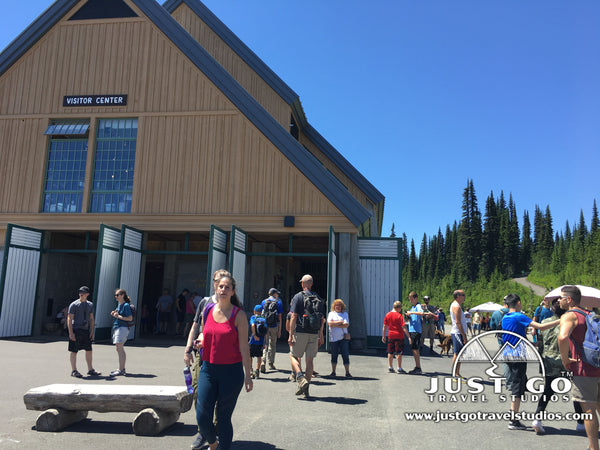
There are restrooms available in both the Henry M. Jackson Visitor Center as well as near the Paradise Inn. There are also restrooms on the trail (near Panorama Point), but it is miles up the trail, small, and occasionally closed for cleaning.
HIKING THE SKYLINE TRAIL TO PANORAMA POINT
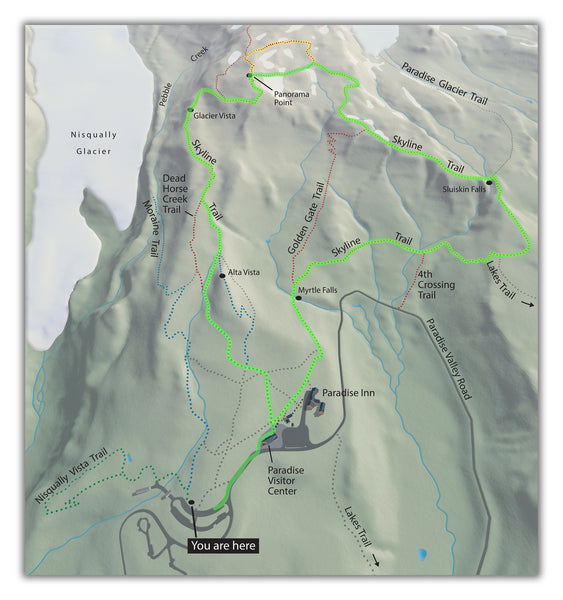
Mount Rainier Sunrise Trail Map, courtesy of the National Park Service
Before starting off, you’ll want to make sure you are adequately prepared for the hike. This includes carrying plenty of water since there is no place to get water along the route. Additionally, you’ll want to make sure you have protection from the sun, including sunglasses, a hat and sunscreen. The sun can be very strong at this altitude and about 90% of the trail is exposed.
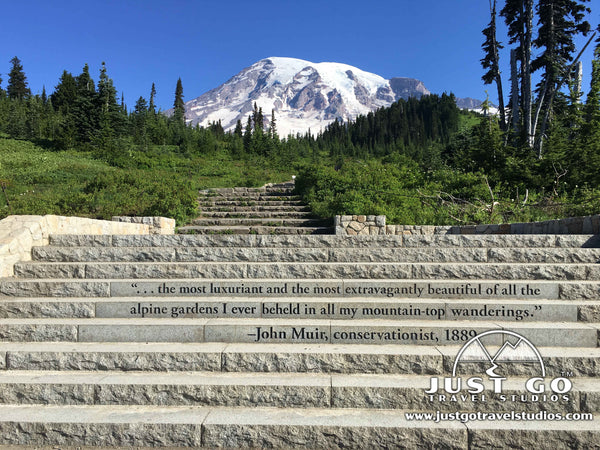
The official start of the Skyline Trail is at the top of the stairs, just a few steps to the north of the Henry M. Jackson Visitor Center. We recommend starting here and hiking clockwise (for a steeper climb and more impressive views on the way down).
The total elevation gain of this hike is 1,758 feet, and we’ve found that hiking the steepest portion of the trail going up to be the best practice. This is what most other hikers recommend as well.

The first part of the trail is paved and starts uphill quite steeply. This incline is steady and lasts 1.4 miles. Quite a few people start off on this part of the trail, as it is the route that takes hikers to the Glacier Vista (which is just over 1 mile up the trail) and also over to the Moraine Trail, which takes hikers down and to the west. It is also the same trail that heads to the Camp Muir Route, which is one of the most popular routes to the peak of Mount Rainier. Only a portion of those starting this trail will continue to Panorama Point, so don’t worry that it will this crowded the entire time!
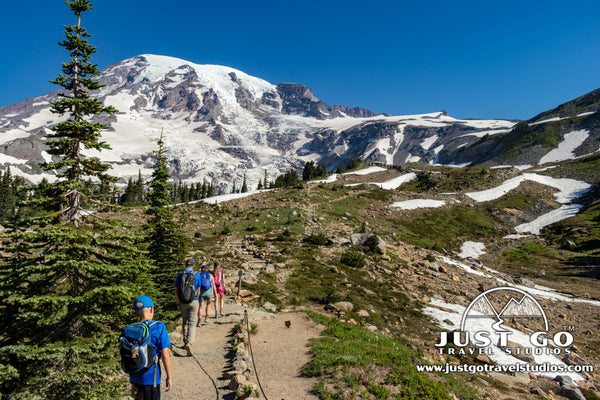
While steep, the hike up is beautiful. On the way up to Glacier Vista (which is about 1,000 feet above the base of the hike), the trail passes through a ton of wildflowers and borders the pine forest. About 0.5 miles after the start of the hike, the trail splits off to the left-this is the Dead Horse Creek Trail.
We took a short diversion on this trail to get a closer look at the glacial runoff from the Nisqually Glacier, which turns into the Nisqually River. The moraine created by the Nisqually Glacier was much larger than we had imagined it could be. It was amazing how loud the Nisqually River was, even from this far away!
While the Dead Horse Creek Trail eventually meets back up with the Skyline Trail (about 0.4 miles up the mountain), it was snow covered and impassable, so we had to retrace our steps to get back to the Skyline Trail.

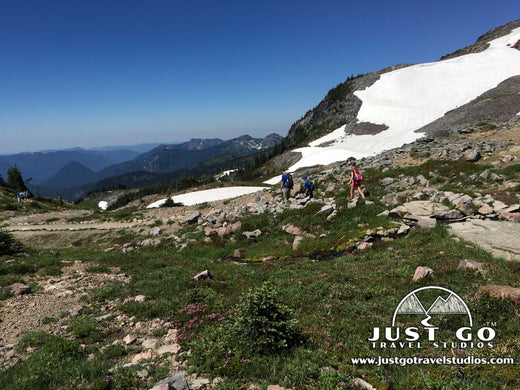
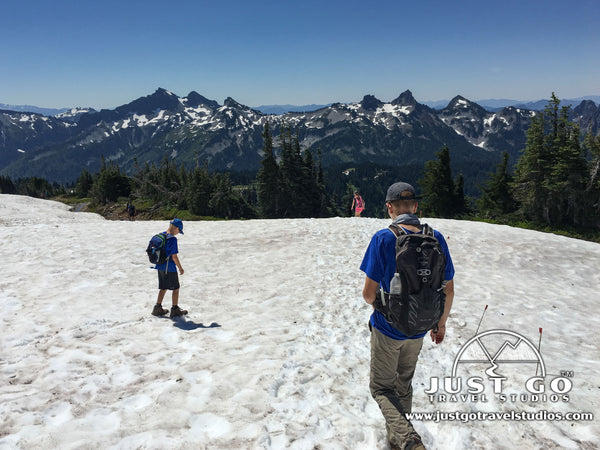
After passing the Glacier Vista stop, the crowds thinned out significantly. We found a quiet spot about 1.4 miles into the trek with some shade and took a break and refueled before finishing up the climb. From here, we enjoyed watching the climbers head up the Camp Muir Route for their two-day trip to the summit of Mount Rainier.

After our brief stop, we charged on the remaining half-mile to Panorama Point. The trail flattens out for a brief period before resuming the final climb (albeit easier than the first part of the hike) to Panorama Point.
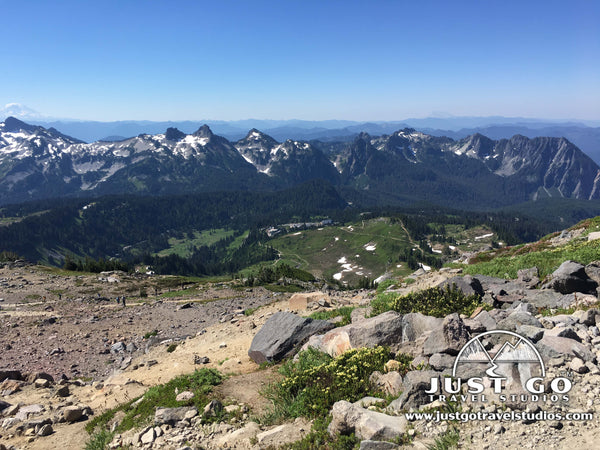
PANORAMA POINT
Mount Rainier’s Panorama Point is a viewpoint to the south. On a clear day (which doesn’t always happen!), it’s possible to see mountains from the Tatoosh Range. This includes views of Mount Adams, Mount Baker and even Mount Hood (though views this far are rare!).
Nearby Panorama Point, there is a toilet. We can’t even imagine the work it takes to keep this facility clean-it is so high up!
HIKING ON THE SKYLINE TRAIL FROM PANORAMA POINT TO PARADISE
After Panorama Point, there are a couple of options. One is to continue to the High Skyline Trail and the other is to head directly east. The High Skyline Trail adds about 0.1 extra miles onto the hike and an additional 200 feet of elevation gain. While we intended on taking the High Skyline Trail, the snow cover was too heavy and we opted to take a path that was marked by the National Park Service to cut across to the west.
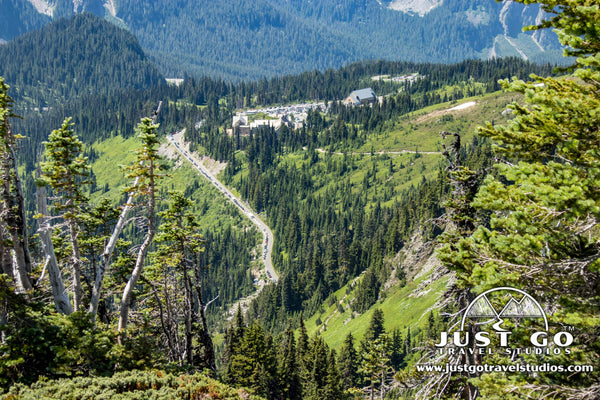
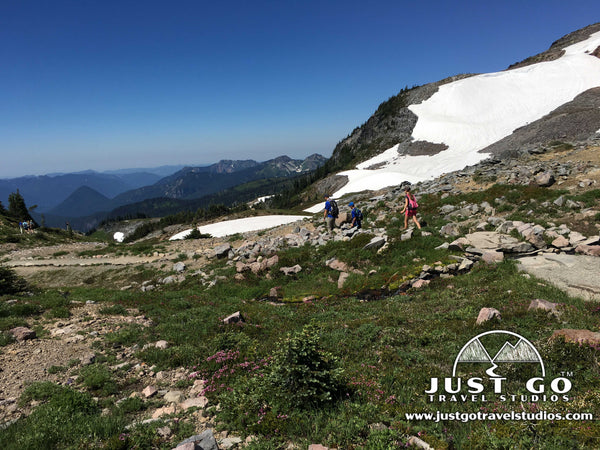
After we met back up with the High Skyline Trail (which then again meets up with the Skyline Trail), the terrain changes to a much more open landscape. From here, the trail descends continuously for the next 3.2 miles (with a small incline near the end).
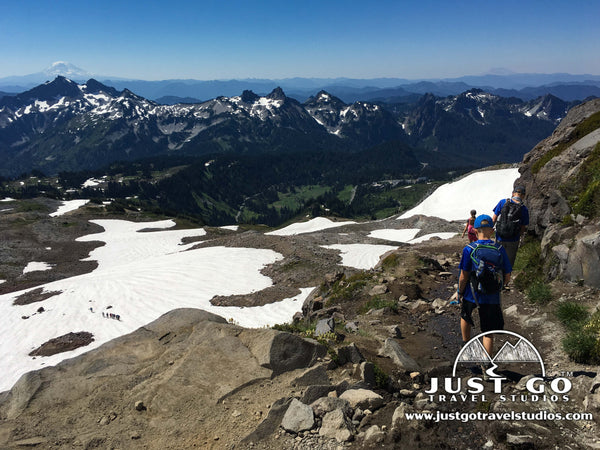
On the way down, the views to the east are amazing. About 1.2 miles down from Panorama Point, the trail splits. One option is to head south on the Golden Gate Trail, and the other is to continue on the Skyline Trail. The Golden Gate Trail shaves off about 0.9 miles through a set of short switchbacks before making a direct line to Myrtle Falls.
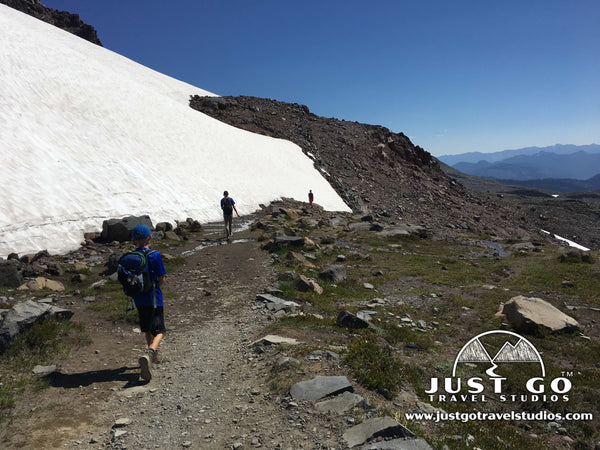
We continued on the Skyline Trail, as we wanted to see the Paradise River and Sluiskin Falls. Along the trail we encountered quite a bit of snow, even though it was mid-July. There were a few parts where we had to go through snow while heading downhill, which was a bit challenging (even with good hiking shoes).
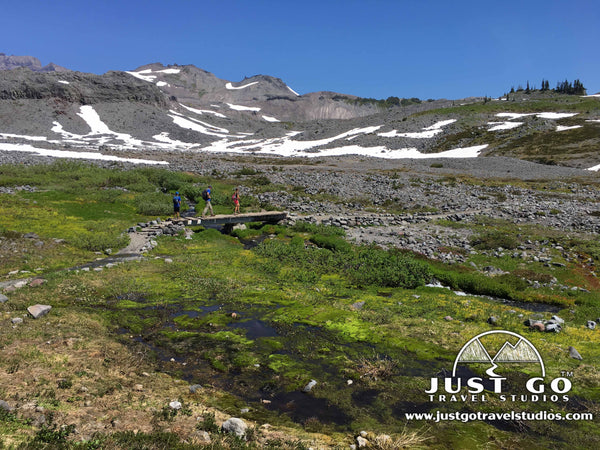
We encountered several river crossings (which were easy during our visit in mid-July) and had outstanding views along the entire way.
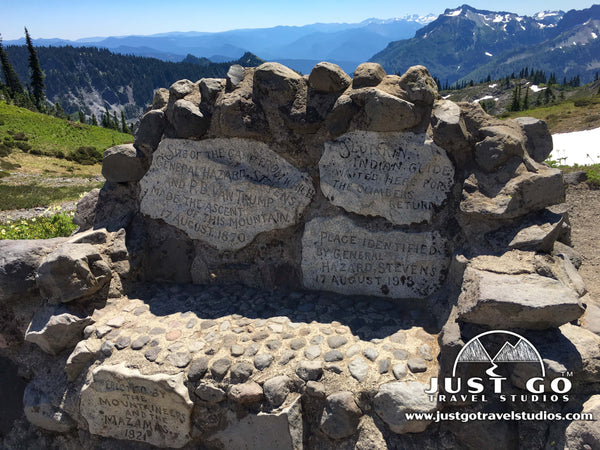
Approximately 0.7 miles after the intersection with the Golden Gate Trail is the Stevens Van Trump Monument. This just looks like a strange pile of rocks in the distance, but upon closer view it’s a bench with writing carved into the rocks. It was built at an old campsite from 1870, where Hazard Stevens and P.B. Van Trump slept before making the first documented ascent up Mount Rainier. The monument was built in 1921.
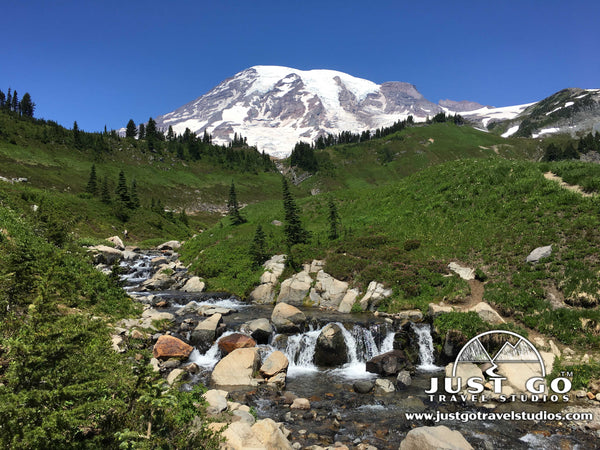
The Skyline Trail continues down the mountain and eventually meets up with the Golden Gate Trail. Shortly after, you’ll come upon Myrtle Falls. This is where the crowds pick up significantly, as this is a major destination for visitors to the Paradise Area who are only up for a relatively short walk. It is only about 0.4 miles from the visitor center.

Myrtle Falls is a cascading set of waterfalls about 72 feet high. The waterfall is pretty, but what makes this spot special is the backdrop of Mount Rainier.
After Myrtle Falls, the trail continues on pavement all the way back to the Henry M. Jackson Visitor Center.
FINAL THOUGHTS
- Keep in mind that while this trail doesn’t require much in the way of difficult hiking (it is on a well-marked paved or packed dirt trail), the elevation gain and altitude makes it quite a challenging hike. Make sure you have plenty of time and are well hydrated before and during the hike.
- Check with the ranger station ahead of the hike for trail conditions. Snow may make parts of the hike impassable or closed.
FURTHER INFORMATION ON MOUNT RAINIER NATIONAL PARK FROM JUST GO TRAVEL STUDIOS
- We have a complete guide to Mount Rainier National Park the we recommend checking out. It includes what to pack, tips on where to stay and we rank the most popular hikes in the park. Reviewing this ahead of your trip will help take the guesswork out of planning!
- Not convinced that Mount Rainier is for you? Check out our blog on 8 reasons why you’ll fall in love with Mount Rainier National Park. We also have an extensive blog on the Best Hikes in Mount Rainier National Park.
- Another great hike in Mount Rainier National Park is the Grove of the Patriarchs trail. This hike is particularly great for all ages and our blog will show you what to expect.
- Once you return from your trip, contact us and we’ll work with you to create a vintage-style travel poster from your photo. We know you’ll love this one-of-a-kind memory!

OTHER INFORMATION ON THE PARADISE AREA IN MOUNT RAINIER NATIONAL PARK
- Interested in something a little more intense? Sonja (from the “National Parks Girl”) has a great blog on Backpacking the Wonderland Trail in Mount Rainier.